
How to Make Homemade Cold Foam
Our community of coffee enthusiasts is always on the lookout for the next big thing, and cold foam is currently pretty—ahem—hot right now.
Topping a cappuccino or flat white with microfoam has always been a pleasant tradition for me. It is possible to substitute cold foam for hot foam and have the same smooth, creamy texture on top of your iced coffee beverages.
You don’t even need a doctorate in chemistry to perform it yourself, which is a huge advantage. While it would be possible to purchase a costly machine similar to the ones seen at Starbucks, there is no need to spend the money if you do not have to.
Our investigation into the world of cold foam will cover what it is as well as how to prepare a delicious batch in your own home. Fasten your seat belts because you are in for a bumpy trip.
Cold foam – what is it?
Cold foam is a kind of milk foam that is served cold rather than hot, as the name implies. Because it includes proteins and fat, milk is an excellent foam producer. Although high-fat milk such as two percent or whole milk work best for making hot foam, it is not necessary. Those who want low-fat or nonfat milk could use cold foam instead.
Both varieties of foam are created in a similar manner, with the exception of cold foam, which does not need the liquid to be heated before foaming. Because it won’t turn into a lukewarm mess, cold foam is great for iced coffee or cold brew coffee.
Cold foam’s first manifestations
Beer firms in Japan sought to develop a thicker, more flavorful head for their customers, which resulted in the invention of the first cold foam machines. Using cold foam was pioneered by Kirin, which was one among the first companies to do so in 2012.
Starbucks, on the other hand, was the first to introduce the trend in coffee, back in 2014. Cold foam was then introduced across the nation by the end of 2017. However, you can now obtain cold foam on any cold coffee from the shop if you use the original mix, which was created for the Americano con Crema beverage.
Coffee giant Starbucks can afford to purchase high-tech technology for the production of its froth since it is a big organization. These gadgets are similar to a high-end blender, but with a blade that is specially designed to generate foam rapidly and uniformly rather than a conventional blade.
However, it is possible to get a comparable result without the use of this supplement.
Creating cold foam in the manner of Starbucks is simple.
It’s unlikely that you’ll ever want to drink an iced beverage without cool foam again after you’ve tried it.
The Professionals’ Guide to Becoming a BaristaHow to Make Homemade Cold Foam
3 Reasons To Make Coffee With Bottled Spring Water Use Flavored Syrups in these 9 Different Ways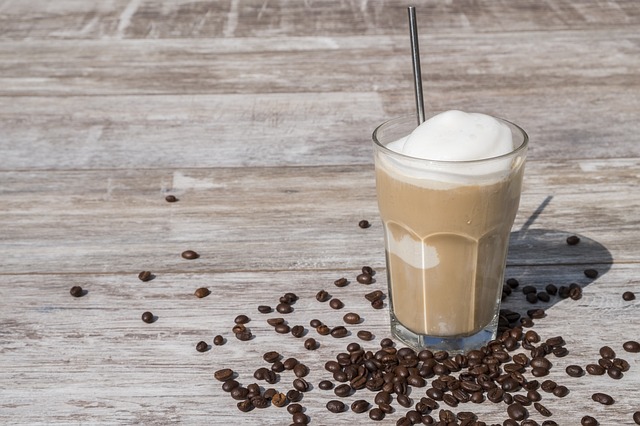
Based on your preferences, you may pick from a variety of various approaches, as well as ordinary foam and flavored foam. It’s important to practice your technique so that you can do it correctly the first time. Some preparation alternatives are more difficult to master than others.
You’ll need the following supplies:
Actually, you just need one device, such as one of the following models.
press in the manner of the French language
Blending in a Mason jar
Microwave milk frother on a stick Microwave mixer on a stick
The specifics of how to utilize each choice will be discussed in more depth later. If you have at least one of these goods in your kitchen right now, there is no need to go to the shop and purchase anything more for the time being (except maybe milk).
Cold foaming milk that is the most effective
As previously stated, nonfat milk is the greatest option for cold foam, but high-fat milk is the best choice for hot foam, as does whole milk. If you’re not a fan of cow’s milk, you may substitute almond, soy, or oat milk for a healthier option. If the fat content is kept to a minimum, it should be suitable for this procedure.
Make cold foam in five different ways.
To create cold foam, the most important step is to minimize the size of the bubbles that appear on the surface. The reason why smaller air bubbles are desirable is that they may keep their form better and result in a smoother and creamier foam when mixed with other liquids.
If you want to accomplish this result, you’ll need to froth your milk for a longer period of time than you may imagine.
In each of these situations, you should start with around half a cup of milk. More foam may be achieved by increasing the amount of milk used. It is important to note that you should not combine liquid milk with foam since this would disturb the bubbles and result in a flat, watery substance. rather of frothing additional milk, scrape out the old foam and start again.
Using a French press, create cold foam.
In order to produce cold foam, a barista pumps the plunger of a stainless steel French press.
Because this device is intended to separate coffee grinds from liquid, it includes small holes that allow fluid to flow through.. The plunger of a French press should be moved forcefully up and down for many minutes while making cold foam.
Having reached the correct consistency, remove the cap and carefully ladle the foam over your coffee cup or mug. This approach is labor-intensive, but it produces the highest-quality foam in our opinion.
A mason jar may be used to create cold foam.
Because a mason jar has an airtight cover, this low-tech alternative works well with it. Simple as that: just pour the milk in, secure it with the top, and shake it until it becomes frothy. The amount of milk you use will determine how much of a workout you will get out of this approach, so prepare appropriately. On the whole, using a jar for everyday use is not recommended.
Using a blender, make cold foam.
You may make cold foam using your blender in case you are short on time, as well. Press the pulse button a few times to get the best results possible. Increase your bubble production by increasing the speed at which the blades spin.
Smooth foam may be achieved within a few seconds, depending on your blender, but most blenders will need a bit more time to do this (about half a minute).
Using a hand-held milk frother, create cold foam.
Produce chilled milk foam in a steel jug set on an ice-filled bed with the help of an electric hand milk frother.
In this case, the bed of ice is completely unnecessary.
Serious coffee drinkers are likely to already have a milk frother in their home. If you want hot foam, a portable frother is ideal, but you can get a comparable result with cold milk as well.
The milk should be stirred until it is nice and thick, so use a mug or cup to do so. Make sure you choose a cup that is big enough to accommodate the increased volume of the drink once it has been brewed.
Handheld mixers may be used to create cool foam.
Although an immersion blender functions in a similar way to a milk frother, the process will take longer due to the larger blades used. Once again, use a big mug to accommodate the quantity of foam you’re attempting to create with your mixture..
Making flavored cold foam is a straightforward process.
When it comes to cold foam, there are a variety of taste alternatives available if you don’t like nonfat milk. Nothing more complicated than mixing some flavored syrup into your milk before frothing it.
You won’t need as much milk as you may assume since there is no “ideal ratio” between the two ingredients. Begin with a little trickle and gradually increase the amount of liquid used until desired results are achieved. You may also taste the foam as you go to see whether it’s too sweet or not sweet enough for your taste buds.
Mint, chocolate, and vanilla extracts are some of the most popular flavoring alternatives. If you want a better-tasting foam, feel free to experiment with various syrups.
Enjoy!
Light Roast Coffee Brewing Guide Easy French Toast Latte Recipe Lemon-infused espresso CAULIFLOWER RICE TABBOULEH WITH SPICED GRILLED CHICKEN