4 Ways to Darken Your Dark Roast
Please join me in taking a stroll down memory lane to your very first cup of coffee. Depending on your age, you may have been 30 or 12! That very first sip of coffee was probably not made with a single origin, speciality grade coffee bean in mind. There were coffee undertones in the flavor notes. What else could it be except coffee?
Although the notion of eating it every morning may be one of the few things that motivates you to get out of bed in the mornings, Your family’s drip coffee machine may have had a distinct fragrance while it was in operation. After a while, each drop of grocery store’midnight roast’ appeared to become darker and darker, until you had a steaming hot cup of impenetrable black coffee that practically bites you in the mouth, but it’s great. It’s… a cup of coffee, really.
If this sounds like coffee paradise to you, it’s probable that you’re the kind of person who wants your coffee to be BOLD and STRONG in every way possible. When you get a light roast or a medium roast, it’s simply not the same thing, you know? Even more frustrating is when you get a dark roast and assume that it must be the light roast… right? Certainly not a dark roast,” says the bartender. Suddenly, tears stream down my cheeks.
Never fear, my inky coffee-drinking companions. This is where we come in to show you the light, er, dark—so you’ll never have to deal with another cup of coffee that’s too weak. Remember that it’s usually a good idea to start with a recipe and then make little adjustments one at a time until you find the combination that works best for you!
1.Change the ratio of coffee to water in your brewing system.
You may already be aware of this, but adding extra coffee to your brewing process can undoubtedly aid you in obtaining the stronger cup of coffee that you want.
To get a few more kicks, all it takes is an additional few scoops of ice cream!
Secondly, you may change the grind size or the brewing time.
When it comes to those of you who grind your own coffee, grinding it a little finer can help you extract even more flavor from your cup of joe. Using a French Press, for example, you may try switching from a coarse grind size to a medium-coarse grind size. If you’re feeling very adventurous, you may even try a medium-fine grind size.
Increase your brew time if you’re purchasing coffee that has already been ground for you. The same impact as increasing the amount of time your coffee grounds spend in contact with your water may be achieved by decreasing the grind size.
3.Experiment with Different Brewing Procedures!
Some brewers are more daring than others when it comes to their beer…
If you like a strong, powerful cup of coffee, the French Press is our go-to option. Fill the bottom of your French Press halfway with coffee and plunge all the way down so that the strainer meets your coffee grinds comfortably, leaving no space for additional coffee. A bonus is that this procedure will save you from getting sick from bitter coffee!
The Pour Over method is yet another excellent brewing technique for producing robust coffees. Achieve the level of control over your coffee that you’ve been seeking for with this maker! This technique often asks for a medium-fine grind, making it ideal for those who prefer to purchase ground coffee rather than whole bean.
The Aeropress is the last, but not least, of our tools. The internet is brimming with strong coffee recipes that are suitable for this handy machine, so be creative! As a bonus, it’s an excellent alternative for espresso. It could be worth a shot (no pun intended) to see what happens.
4. Raise the temperature of your drinking water.
You are correct, of course. The use of hotter water improves extraction, which may be the missing piece in the jigsaw of your sluggish coffee. Temperatures between 200 and 205 degrees Fahrenheit should be used as a reference. Going hotter than that may result in something more bitter—but if that’s what you’re looking for, then you’ll know how to make it work!
Interested in a cup of coffee that has already reached a sufficient dark color?
We urged you to journey back in time at the beginning of this piece, but now it’s time to look forward. Which of the following do you notice? You’re probably consuming dark roasts that aren’t quite black enough. Then do yourself a favor and place an order for some EXTRA DARK roast coffee from yours truly, Atlas Coffee Club.
In order to participate in the club, you must first join up for it. Once you have done so, you may adjust your choices in your coffee portal to Extra Dark Roast.
If we wrote this piece while fueled by a batch of Extra Dark coffee beans, you can take our word for it that it is, in fact, the best coffee for anybody searching for a dark, dark roast coffee.
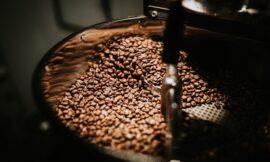
Coffee Roasting Instructions: How to Make Awesome Dark Roast Coffee
Despite popular belief, dark roast is still alive and well today. To be honest, dark roast coffee is still preferred by the majority of people in America. Despite the fact that lighter roasts are popular right now, they still still represent a small portion of the overall coffee industry. Many coffee manufacturers now offer a variety of roasts, and if you decide to roast your coffee darkly, it is critical that you learn the art of coffee roasting. Fortunately, there are many resources available to help you. William provides some advice on how to deal with a dark roast in this video.
When it comes to coffee, one of the most enjoyable aspects is the sheer range of tastes that can be obtained by blending coffees from different growing locations and roasting them in various ways. Getting your hands on a fresh coffee bean and determining where to begin with a recipe may be challenging. Asking a barista or roaster for help whenever possible is always recommended. Whenever all else fails, there’s a simple rule of thumb that will ensure that you get the most out of your morning cup of coffee.
Some of our favorite coffees may be found in this section. Each one has a different roasting level: one is a dark roast, one is medium, and one is light roast. According to most experts, the roast profile has the most influence on the recipe you should use. In order to match the 20-gram basket that we’ll be utilizing with this LUCCA M58 V2, we’ll be using a dosage that’s the same size.
What you should remember about various roasts is that the beans become more porous as they are roasted, and some components break down as the beans are roasted more. With each roasting, the bean’s density diminishes, making it simpler for water to extract the tasty dissolvable particles off the bean’s surface. For the most part, pulling flavors from a dark roast is simpler to do than pulling tastes from a lighter roast.
Chart of the Coffee Roasting Characteristics
After taking everything into consideration, let’s go on to the medium roast, which is Cat & Cloud’s Night Shift Blend. A recipe that falls just in the center of the medium roasting range is the one I usually start with when dealing with it. All first-time home baristas should start with this version of our basic “Clive Recipe,” which we suggest to all of them. My objective is to draw a shot with a 1:1.5 ratio of coffee to water, which equates to a 30-gram shot of espresso. Aside from that, I’m going to maintain the PID at a temperature of 200°F, which is just in the center of the recommended temperature range for brewing. I’ll take this recipe as a baseline, dial in my shot, and then make tweaks depending on my own preferences.
Move on to a dark roast, such as Verve Bronson French Roast Blend, which is a good choice. The great thing about roast levels is that you can know what the coffee requires simply by looking at the beans, even if there isn’t anything written on the package. With these, it’s evident that the roast is a deeper shade of brown. Given the dark roast, we want to be a little more delicate with our recipe in order to avoid over extracting and resulting in tastes we don’t want to consume.
As soon as I start working with a dark roast, the first thing I want to do is drop the temperature by a few degrees, beginning around 195°F. My brew ratio will remain the same, but I will alter my grind to get the same 30-gram output in around 22 seconds. Reduced bitterness from dark roasted coffee is achieved by the use of lower temperature and shorter brewing time. By doing so, the shot becomes a little sweeter and smoother while still retaining the chocolate and molasses flavors.
The last shot will be made using a light-roasted coffee, such as Olympia Coffee Roaster’s Little Buddy Blend, to round things off. Once again, a quick check at the color of the beans reveals that this is a lighter roast than the last one. This is one of our favorite coffees around here, and we make it a point to have a bag or two on hand all of the time! It’s more difficult to extract flavors from this lesser roast since the beans are thicker as a result of the lighter roast. I’ll start with a slightly higher temperature of 203°F in order to account for this.
In general, I like lighter roasted coffees drawn with a slightly higher ratio, so I’ll aim for a 1:2 ratio with a yield of 40 grams of liquid espresso and a shot duration of 28-30 seconds for this particular recipe. Our coffee will have all the tastes we want if we increase the duration and temperature at which it is brewed. It would be quite sour and salty if I used our dark roast recipe for Little Buddy to make the shot for him. This recipe will result in a better balanced, sweet shot that I’d be happy to consume or present to my friends and colleagues.
Dark, medium, and light roast coffee recipes are included.
Despite the fact that all three of these shots turned out well, there is nearly always space for improvement in the coffee industry. These recipes are a fantastic starting point, but after tasting my first shot, I’ll nearly always make little tweaks to get that little bit of additional sweetness or brightness out of a coffee bean. Adjusting your temperature or shot time by a second or two at a time is a terrific approach to discover what a specific coffee has to offer and to reach that ideal balance that we’re all striving for.
Check out our Intro to Home Brewing course for additional information and instruction to help you refine your coffee brewing abilities.
 READ MORE–Ranking of Store-Bought Coffee Brands from Worst to Best–
The Fundamentals of Coffee Grinding
How to Roast Coffee
READ MORE–Ranking of Store-Bought Coffee Brands from Worst to Best–
The Fundamentals of Coffee Grinding
How to Roast Coffee