
How To Make Excellent Coffee With A Moka Pot
Do you like a good cup of joe? Sure, getting a cup of coffee from a café or preparing instant coffee at home before work will get the job done, but there’s an even better option out there. Learn how to use a moka pot if you want a simple method to make high-quality coffee in the comfort of your own home or even over an open fire.
Cooktop coffee makers known as moka pots are of Italian origin and brew by applying pressure to grounds. The moka pot was created in the 1930s by Alfonso Bialetti. In recent years, it has gained widespread acceptance all around the globe, but mainly in its own nation.
Beyond being a fantastic beer maker, it also has a distinctive look that makes it entertaining to have around. There are plenty excellent moka pots available for purchase.
In addition to aluminum, moka pots are also available in stainless steel and other metals. This makes them almost indestructible, which is a significant benefit when comparing a moka pot to a French press, for instance.
Do you need a large or small moka pot?
When choosing the size of a moka pot, consider how much coffee you want to prepare and how much space you have available. It is available in eight different sizes, ranging from one cup to 18 cups, from Bialetti, the world’s leading manufacturer of moka pots.
The Bialetti company, on the other hand, considers one cup to be equal to 40 milliliters (or 1.35 fluid ounces). It is about espresso cups that they are talking about. As a result, if you want to make a standard eight-ounce cup of coffee, you’ll need a 6-cup moka pot.
the several types of moka pots
Listed here are the different sizes of Bialetti’s moka pots, along with the amount of coffee each will produce in eight-ounce cups in the United States.
Sizing Information for Bialetti
How To Make Excellent Coffee With A Moka Pot
HOW TO CLEAN YOUR BBQ GRILL AND TOOLS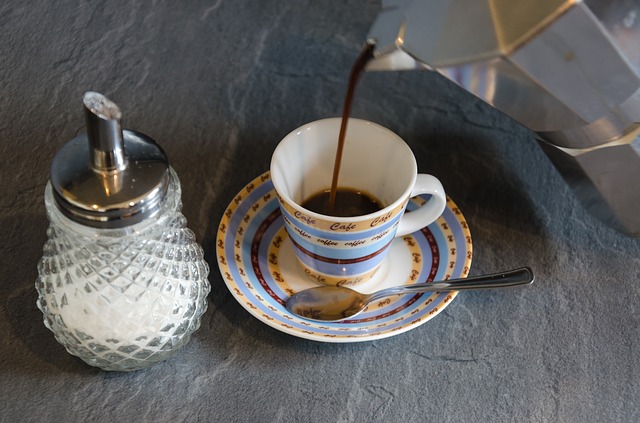 Is it Possible to Make Espresso using Regular Coffee?
3 Reasons To Make Coffee With Bottled Spring Water
Use Flavored Syrups in these 9 Different Ways
Light Roast Coffee Brewing Guide
Easy French Toast Latte Recipe
Is it Possible to Make Espresso using Regular Coffee?
3 Reasons To Make Coffee With Bottled Spring Water
Use Flavored Syrups in these 9 Different Ways
Light Roast Coffee Brewing Guide
Easy French Toast Latte Recipe
They’re not huge, but a moka pot is similar to an AeroPress in that it’s excellent for preparing a cup or two of coffee.
Why are the sizes of Bialetti so small?
A moka pot is sometimes referred to as a “stovetop espresso machine.” This is false, since espresso must be made at a least of nine bars of pressure, which moka pots cannot achieve.
However, by using as many coffee grounds as possible in a moka pot, you may brew rich, concentrated coffee. Many Italians make this as a quick stovetop substitute for espresso, which explains the small cup sizes.
The size suggestions are based on the fact that I want to teach you how to produce ordinary cups of coffee rather than thick, espresso-like thimbles in this article.
Is it true that a moka pot steams milk?
“Hey, if Italians use moka pots as an espresso alternative, does it also steam milk?” you may question.
Milk cannot be steamed in a moka pot. For your lattes and cappuccinos, you’ll have to make everything individually. However, I know of someone who transformed a moka pot into a milk frothing machine. Take a look!
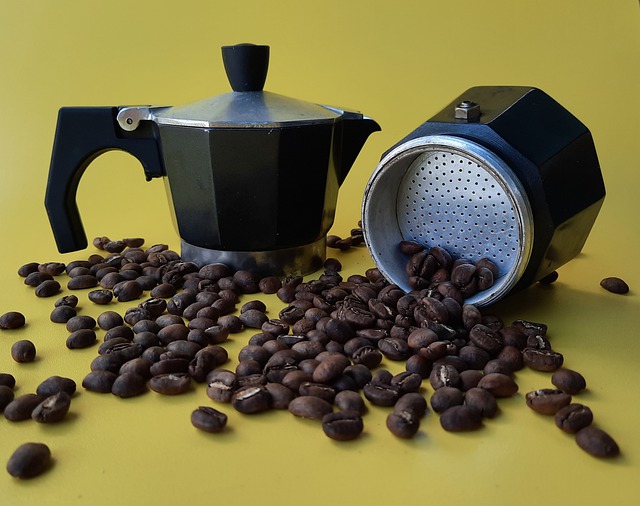
What is a moka pot and how does it work?
There are three chambers in a moka pot. The water is kept in the bottom chamber. Your coffee grinds are kept in the center chamber. After the pressure from the hot water has gone through the grinds and extracted the coffee, it is stored in the top chamber.
The bottom chamber warms the water, the top chamber collects the coffee, and the middle chamber retains the grinds in a moka pot.
From left to right, parts of a moka pot: The water is heated in the bottom chamber, the coffee is collected in the top chamber, and the grounds are kept in the middle chamber.
The pressure drives the water through the grounds just as it starts to boil, resulting in concentrated coffee.
How to make coffee in a moka pot
Some people are put off by the moka pot’s strange look, but if you know how to use one, the procedure is really fairly straightforward. If you’re new to this form of brewing, pay careful attention to these moka pot instructions.
1. Pour water into the bottom chamber.
Fill to the top of the valve.
Only fill the bottom chamber up to the pressure-release valve’s bottom. (Bean Poet) Fill the bottom chamber with water until it reaches the bottom of the pressure-release valve, but not all the way to the bottom. This is your moka pot’s maximum capacity.
The safety aspect of the pressure-release valve is crucial. The valve enables pressure in the bottom chamber to escape if it builds up. To achieve this, it must be crystal obvious.
This is a terrific idea if you can weigh your water as you fill it using a scale. It will assist you in determining the right quantity of coffee to ground in the next step. If you don’t have a scale, just fill the valve to the bottom.
2. Make the coffee.
Prepare your beans by grinding them.
Make a medium-fine grind using your beans. The optimal grind size is somewhere in the middle of what you get with a drip coffee grinder and what you get from an espresso grinder. You may play around with this. Divide the weight of water you weighed in the previous step by 16 to obtain the right weight of coffee to ground.
3. Put items in your cart.
Shake the basket to level the coffee grounds, but do not tamp them down.
For most brewing techniques, I propose a coffee-to-water ratio of 1:16, which is conventional. If you don’t have a scale, filling your basket to roughly two-thirds of its capacity, presuming you’ve poured your water to the bottom of the pressure valve, should be about appropriate.
People on other areas of the internet say that moka pot baskets must always be filled to the brim with grinds and then leveled. This is stated explicitly in Bialetti’s guidelines. This, however, is just not true, as I learnt from a coffee enthusiast in Little Italy.
Filling your grinds to the rim will result in a coffee-to-water ratio that is significantly greater than what is suggested, even for strong coffee, due to the capacity constraints of the water chamber. This is overwhelming for many individuals. Again, if you’re aiming for an almost-espresso-style coffee, go for it. Otherwise, keep to a standard proportion.
4. Place the basket inside.
Place the coffee grounds basket in the water chamber’s aperture. With its tube hanging in the water, it should fit snugly.
5. Screw on the top screwing on the top screwing on the top screwing on the top screwing on the top screwing
Check that the threads are aligned appropriately and that the top is screwing on smoothly.
Place the top chamber on top of the bottom chamber, aligning the threads, and screw the two chambers together. They should be able to screw together easily. Unscrew and realign the threads if you encounter resistance.
6. Turn on the water burner to medium heat.
Make an effort not to be in a hurry. A consistent extraction should be achieved using medium-low heat on the burner. With the cover turned open, heat the moka pot on a medium-low fire. To protect the handle from melting and from burning yourself when you hold it, make sure it isn’t directly over the heat source.
7. Keep an eye on the brewing moka pot in the top chamber.
You can see the empty top chamber, the initial drop of coffee, the chamber starting to fill, and ultimately a virtually filled chamber in this series of photographs.
Pay attention while the coffee is brewing. Steam will be forced up through the tube and into your coffee grinds because to the pressure caused by the heated water. Coffee will start to dribble down into the top chamber as it bubbles up from the chimney. Your coffee is ready when the chamber is almost filled and the chimney starts to spit and squirt.
8. Take it out, pour it, and enjoy it.
Remove the brewer from the flame and set it aside. Some people like to place it on a cold moist cloth to fast stop extraction, but we don’t think this is essential. Because there is very little water left in the bottom chamber, extraction is almost complete. If you pour your coffee into a cup immediately away, you won’t have to bother about this step.
The coffee is poured into your cup and is ready to be consumed. (Source: Bean Poet)
Moka pot coffee troubleshooting
Brewing your coffee should be simple if you follow the directions. When it comes to achieving the proper flavor, though, this might be difficult. The flavor of your brew may be influenced by a variety of things.
Tastes metallic
You may have just overcleaned your pot if your coffee tastes metallic.
That seems strange, doesn’t it? Why would cleanliness detract from the flavor of your coffee? Overcleaning your moka pot, on the other hand, actually removes the residual coffee residue from previous brews, similar like seasoning a cast iron frying pan with olive oil. You’ll notice a harsher metallic flavor if your brewer warms your coffee without this residue.
Bitterness
What if the coffee you’re drinking is too bitter? This might be due to a variety of factors.
It’s possible that you over-extracted. Because the brewing time and temperature in a moka pot are very stable (the maximum amount of water is determined by the pot’s capacity), your only option is to adjust the grind size. Bitter tastes are found in the core of coffee granules, and the smaller the grinds, the simpler it is to extract those bitter flavors. So, next time, try a little coarser grind to keep the bitter tastes within.
Bitterness may develop as a result of your beans. Coffee beans that have been over-roasted or are of low quality have a naturally bitter flavor. Keep an eye on your beans’ freshness. When you make coffee with stale beans, the result is a strange flavor.
Coffee that isn’t good
If your coffee is too weak, it’s either because the grind is too coarse or because you didn’t use enough grounds.
a strong cup of coffee
You may dilute your coffee with hot water before consuming it if it’s too strong. Either that, or reduce the amount of grass next time.
Other issues that might arise
Aside from flavor, you could run into certain technological issues. If steam is leaking out of the bottom of your moka pot, for example, you most certainly have a blockage. Remove the whole pot, rinse it, and clean the filter of any residual grinds. If this doesn’t work, you may need to get a new moka pot.
If you’re just receiving a few drops of coffee, you either have a clogged filter or aren’t properly sealing your pot. Unscrew and rescrew your pot a few times. As you screw the chambers together, make sure the threads are lined up and tight. If the issue continues, inspect your filter and remove any obstructions to optimal flow.
How to clean your moka pot correctly
You may avoid having to troubleshoot brewing errors if you clean your moka pot properly. Many individuals struggle with their moka pot cleaning method.
Warm water and a washcloth are all you’ll need. Cleaning a coffee pot without soap may seem contradictory, but soap may alter the flavor of your coffee.
Overcleaning a moka pot, as previously said, destroys remaining taste from previous brews. So, resist the urge to clean your equipment, even if it seems soiled. You should also avoid using abrasive scrubbers.
Dump the grinds from the basket when your moka pot has cooled down. As many as you can get rid of. Remove all of the pieces from the puzzle. Then, using warm water, rinse away any remaining grinds. Remove any residual grounds with your fingertips if required. After everything has been fully cleansed, dry each component of your moka pot with your dry washcloth. You may also let it air dry.
You may either reuse it or store it after it has dried. Before putting it back together, make sure it’s completely dry. Mineral deposits left by water droplets may ultimately cause metal degradation.
Is it better to use hot or cold water in a moka pot?
A previous version of this page had some advise on preheating water for your moka pot that has now become coffee legend, but a Bean Poet reader with some credibility convinced me to modify my view.
Jonathan Atkin is a marine photographer based in the Bronx’s Little Italy. When he was younger, he was obliged to learn how to prepare coffee correctly while working on trans-Atlantic cargo ships. It was his responsibility to serve it to the officers in their mess.
“I quickly discovered that coffee is as important to a ship’s functioning as gasoline,” Jonathan wrote.
He is still a connoisseur today.
Jonathan was particularly offended by the notion that moka pot coffee should be made with hot water rather than cold water, and that the water should be boiled beforehand before being poured to the brewer. He’d spoken to a few Italian pals and their nonne about it (grandmothers).
“I was confronted by Italian jeers that I am unable to publish,” Jonathan adds. “We have been brewing moka coffee without preheating since the 1930s,” my Italian pals remarked.
I’ve tried it both ways now. I can’t tell the difference. I can no longer advocate preboiling the water since it is an additional, unneeded step. Fill your moka pot halfway with cold water and place it on the fire.
Is it possible to half-fill a moka pot?
The greater discovery for me was that you can half-load a moka pot and not have to fill the grounds all the way to the rim. Even Bialetti recommends filling the grounds filter. However, Jonathan pointed out that this makes achieving a traditional coffee-to-water ratio impractical.
Even for my tastes, which incline toward strong coffee, I’ve considered moka pot coffee to be a touch too harsh and heavy for much of my life. I couldn’t seem to get it right every time.
Following Jonathan’s instruction, I opted to forego the conventional recommendation of filling the basket to the rim and instead calculate my coffee-to-water ratio as I would for any pour-over or drip coffee.
Everything changed after that.
It made a good, strong cup of coffee without the heaviness that I usually find off-putting in coffee. From now on, I’ll make moka pot coffee in this manner.
What is the correct amount of coffee to use in a moka pot?
Simply told, stick to a typical coffee-to-water ratio of roughly 1-to-16 unless you want it extra strong. That’s around 14.5 grams of coffee in a 6-cup Bialetti moka pot, which contains eight ounces of water to brew a full cup of coffee. Don’t worry if the basket isn’t completely filled!
For various size moka pots, reduce or increase the quantity of coffee. If you’re filling the water chamber all the way to the valve on the 4-cup version, use roughly 9.7 grams.
How much water should be added to a moka pot?
The quantity of water you put in a moka pot is determined by its size, but you should never fill it more than halfway to the bottom of the pressure-release valve, which can be seen on the interior of the lower chamber.
I wouldn’t attempt to brew with the chamber less than half filled, either. You may not have enough time to respond if it heats and brews too rapidly.
However, don’t be scared to make half the amount of coffee your moka pot can handle. It’s OK if you just want to brew 12 ounces from a 12-cup (16-ounce) version. Fill your coffee maker two-thirds of the way with water and add enough coffee grounds to make a 12-ounce cup of coffee (about 21.5 grams). It’ll function just well.
Moka pot Frequently Asked Questions
Even if you know how to make a conventional cup of coffee, you will have a lot of questions about moka pots. This section addresses frequently asked topics and offers moka pot recommendations so that you may brew to your own personal preferences without sacrificing quality.
What is the best way to brew espresso with a moka pot?
You will not be able to make espresso-quality coffee with a moka pot, regrettably. By filling the grounds basket all the way to the top, you may have a brew that is quite concentrated, similar to espresso. Level it off using the flat edge of a knife, but don’t pack it in too tightly. –
In order to utilize a moka pot, what kind of coffee should I use?
It is entirely up to you to decide. In your moka pot, you may brew a variety of coffees ranging from light to dark in color. In the event that you become sensitive to caffeine after a specific period of time, try brewing decaf or a milder roast to prevent any negative side effects.
Is it better to purchase ground or whole beans of coffee?
If you have your own coffee grinder, it is preferable to purchase whole beans rather than ground. The freshness of whole bean coffee is superior to that of ground coffee since you just grind what you need.
If you can’t afford a coffee grinder, ground coffee can suffice; nevertheless, it is best to purchase in little amounts. It is important to use a certain moka pot grind in order to prevent clogging.
How long does it take for a moka pot to brew?
The amount of time it takes to brew your coffee is determined on the size of your moka pot as well as the temperature at which you are brewing it. When picking the size of your moka pot, keep in mind that larger moka pots take longer to heat the water.
Lowering the temperature at which you brew your coffee normally results in a better tasting cup, but it takes significantly longer. A lower temperature may take up to 15 minutes to brew, but a higher temperature can take as little as five minutes. Experiment with several flavors to discover your particular favorite.
Moka pots are a stylish and very simple method to acquire a powerful dosage of caffeine in a little amount of time. The robust coffee it creates blends well with milk and cream, as well. Whether you like your coffee black or in a latte, this is a reasonably priced maker that is well worth your time.